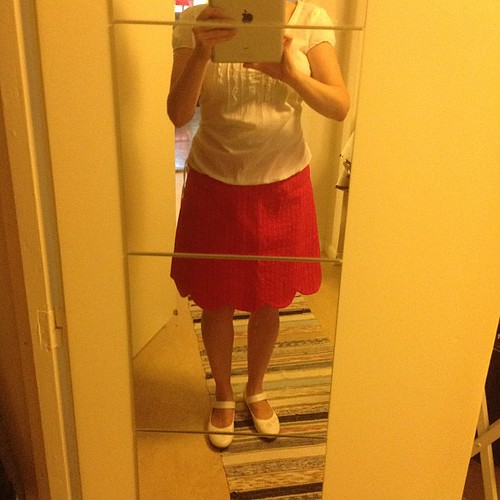
Wednesday, 6 August 2014

Vogue 8789 - First attempt

Getting started

I bought Vogue 8789 on the Vogue sale this spring and finally got around to giving it a try. I bought it for view A and that's the one I decided to make. For material I used bedding from IKEA called NYPONROS in colorway grey/white. It's a fairly sturdy cotton, but soft. The stripes are woven into the fabric, not printed.

  Bad choice of size

I couldn't quite decide on which size to cut, since I fell into different sizes for all my measurements. Since the amount of easy was indicated to be pretty high, I decided on a size 16 (which turned out later to be a mistake) even though my measurements indicating size 18. I measure on the pattern and it seemed it might be ok.

Cutting the fabric and sewing up steps 1-7 was easy. I decided to substitute the armhole facing with bias tape so I did not do step 8.

When trying out the bodice I was dissappointed. The fit was not very good. Allthough the bodice fit my bust width, it was too big in the armscy and shoulders and also on the big side in the waist. It was also too short to go across my bust height and thus the center front at the waist is lifted up and the whole bodice tilts backwards. *sigh* I didn't get any picture of this stage.

Changing the skirt

For the skirt I decided that the bedding was to heave for the massive skirt of gathered rectangles. I recently made Tilly's picnic blanket skirt in a similar fabric and found that all that bulk at the waste was not to my liking. Instead I opted to use a skirt inspired by another pattern, New Look 6675, which I previously made. I used my previously trace size 16 center front piece and made all 6 pieces identical so the stripes would line up on all seams.
 
I cut 6 pieces of skirt and sewed then up, matching stripes at the seams with fairly little effort and used the walking foot when sewing (I have a Bernina 215). After trying it on with the bodice I decided that I wanted the gathered look of V8789 despite changing the skirts and cut off some 15-20 cm at the top of the skirt to make it bigger at the waist. In the end I also cut of 5 cm at the bottom of the skirt since it was too long (which is also was in New Look 6675, but I had forgotten about that). If I had thought of this beforehand I could have save some fabric.

A month later I got started again

 
I let the project rest for a while, since I was undecided about how to handle the bodice fitting issues and since it was vacation and I had other stuff to do. I really should trace a smaller size and do a FBA. However, I didn't feel very excited about that, and decided to just "make it work". The easieast way was to add extra bust darts going in the direction of the armscyes, as you can see in my picture. It's not the usual direction, but if you have a large bust it will usually give a nice result. I pinched and marked with needles with the top on inside out and then sewed them up. I'm not very pleased with the darts since they have sort of nipply ends. Perhaps I'll connect them into a princess seamed bodice instead... should be fairly easy.

Attaching the skirt, inside view

Since the bodice has so much ease I skipped the zipper and sewed the side seam.
 
Finally I gathered the skirt and  sewed it onto the bodice. Seam allowances pressed up on the inside and then a top stitch on the outside. The insides I didn't bother to keep super neat since this was a toille project. The picture shows how the front folds to become selflining. Clever! I pinked the fabric at the edge of that lining, but apart from that most edges are on the bias. I should prolly have pinked the top of the skirt though. I suspect it'll fray a bit when I wash it. Too late now though.

You probably notice by now that I stopped following the pattern instructions. Therefor there is no inner belt as instructed in the pattern. Since my skirt has so much less fabric, I don't think I'll need it though.

Hemming and bias tape


Finally I hemmed the skirt and lined the armscyes with bias tape (red) which I hand sewed to inside seam to make it close to invisable.

What did I think of it? I think I like it.

The dress was finished yesterday and today I wore it to work. I noticed that I must add pockets (always!) and that I kept pulling a bit at the front since it rides a high at the waist due to not enough fabric to reach across the bust. But those issues aside, it was comfortable and the fabric is on the neutral side and will therefor the dress will likely fill a hole in me closet and be used now and then.

I will likely sew this pattern again, and trace a smaller size and make a FBA and see where that takes me. In a lighter fabric I think that the gathered massive skirt might be ok too. I happen to have such a fabric in my stash...

Tuesday, 25 September 2012

Colette Taffy - Second fitting and finishing up

After a bit of resentment at the misery of the first fitting I decided to view this Taffy as a muslin and just finish it up.
Here's a picture of the second fitting, front view. I like it a lot better than the first and I didn't make any changes, except adding the sleeves. This top is all about the sleeves, so it figures it improved a lot with them on.
It's not a lot more flattering, but I think that with the right top under and a less muffin topping bottom it'll be ok.
If I make Taffy again I'll change the shape of the neckline, I'm still not liking this very much.
 
And here is the back view.
The ties are not made of bias binding, I didn't make enough. I cut new strips of the binding fabric and sewed tubes which I turned. I couldn't finding my markings from the pattern on where to attach them, so I tried them out and set them at my natural waist. I thought they gave the most flattering line at that position.
For some reason, now unclear to me, I decided to set the ties at an angle with the side seam. I guess I thought they'd sag naturally at my back and therefor look better at an angle, but as you can see they don't. Instead they pull at the side seam. So I should have set them at right angles with the side seam as the pattern instructed.
I also wish I'd made the ties narrower, to match the binding. Perhaps something like the cording as seen here at the Coletterie.
 
The top folded on top of my ironing board.
Here you can see how narrow the bias tape is. This in combination with the bouncy mystery fabric made it rather tiresome to work. The fabric does not take pressing at all. I tried the printable-bias-tape-maker from The Scientific Seemstress. It was lots of fun printing, cutting, glueing and it worked nicely, at first, before it broke. I think it would have held together better if I'd printed it on sturdier paper and let it dry properly. And of course, it would have worked nicer had the fabric been more willing to be pressed.


Here's a close up of the bias binding, inside and outside at the neck line.
I first sewed the bias tape (unpressed) right sides together close to the seam line. I then trimmed the sewing allowance down to match the bias tape. Then I hand basted the bias tape to the inside of the top. That last step was crucial since the tape was so narrow, the fabric so slippery and also since the bias tape wouldn't let itself be pressed. After basting I sewed it on, stitch in the ditch, from the right side, as you can see on the lower binding. On the upper you can see the somewhat wavy seam as seen from inside the blouse. 

This last picture is a detail of the stiching in the ditch.
This picture also shows my sewing machine, Singer 766.
Now, all I have left is hemming the lower edge and finishing off the ties.
I decided to hand stich a rolled hem seam for the lower edge and have finished the back side of the Taffy.
The waist ties will be shortened to a good length and have their ends finished. I'm thinking perhaps with knots and a pearl or something like that.
When it's all finished I'll get some new pics with Taffy all styled and ready for wear.

Saturday, 8 September 2012

Colette Taffy - First fitting

I started my Colette Taffy a month ago at the sewing camp and today I finally picked it up again.

Last month I cut the pieces, in a size 12. I used a rotary cutter on Åsa's gigantic cutting board and I don't think I would have managed otherwise, not without some kind of fabric stabiliser. The fabric is a slippery chiffon and was doing its best to be all over the place.

I also stay stitched according to Sarai's tips. Then I decided to handle the pieces as little as possible, by packing them up and letting them incubate in my closet for a month.

Today I've been home with a sore throat and a bit of a cold and after five hours of Stargate SG-1 I felt like doing something. So, I hand basted the pieces together to try my Taffy on for the first time!

Sadly, I am not overly pleased with the results. I found the overall look frumpy and unflattering.
  • First, the bust darts have that weird pointy thing going on at the top of the dart.
  • Second, there's excess fabric draping in the back.
  • Third, the overall fit is slightly big or at least not very flattering.
  • Forth, the neckline is not really to my liking.
  • Fifth, I have no idea how to improve on point one to four!

Sunday, 5 August 2012

Colette Meringue

This weekend I finished my pink pinstriped Colette Meringue skirt! Here's a picture! Ok, only almost, I still have some catchstitching left on the hem and lining. My only concern with the pattern is that it used a lot less fabric than indicated, but since I figured this beforehand I bought a lot less fabric and ended up with 5 cm less than I actually needed, so the lining is in a different fabric, but that does not show.

New Look 6675

This weekend I finished the New Look 6675.

Actually finishing the hem took almost as much time as the rest of the dress, but with help from Åsa at sewing camp I got it done.

I made a FBA and added a bust dart on the side. I didn't put in a lining, instead I made bias tape and applied around the top. This is view D, but I skipped the thin halter neck strap. I also skipped the zipper. With a bit of a wriggle I can pull it over my head, so I did extra top stiching in the underbust and waist seams to reenforce them. Oh, I almost forgot, since I'm long waisted I also added some length to the bodice. Also I cut the skirt a little shorter to a length that I like better.


Friday, 13 July 2012

Colette Meringue Muslin

Oh, I forgot I have a blog!

Last night a finished my Colette Meringe muslin. I traced and cut a size 12 despite not being exactly spot on according to the size chart, but it turned out ok size-wise. My only issue is the floppyness of the sideseam, but I hope that's mostly due to the fabric. The skirt is made from a 30 year old cotten bed set which has worn superthin and soft and fraying at the edges.

I had no trouble following the instructions and learned how to insert the zipper. It was a bit fiddly since I don't have an invisable zipper foot. I also machine blind hemmed both the top and bottom lining. The fabric does not hold the blind hem stiches very well though, due to aforementioned age and wear.

I plan on wearing this for a day or two around the house to see if I need to make any changes.


Sunday, 14 March 2010

Nya kuddar, nytt överkast och gammal katt.

Efter lång tids tystnad kommer här en liten pysseluppdatering. I helgen har jag nämligen sytt klart de kuddar som jag började på i julas, samt det överkast till vilket jag köpte tyg till i oktober. Därför vet jag inte riktigt om jag ska vara stolt eller skämmas, nöjd är jag i alla fall. :D

På den första bilden kan du se de två svartvita kuddarna. Den uppmärksamme tittaren kan även se lussekattsbrickan jag fick i julklapp av Mats. Vi råkade glömma bort att packa ner den tillsammans med de andra julsakerna.

På den andra bilden kan du se två rödvita kuddarna. Den ena ganska lätt, den andra enbart genom att veta att på baksidan har de fyra kuddarna samma svarta tyg med stjärnor på. Det är alltså den stora kudden i fåtöljen som är kudde nummer fyra.

Den tredje bilden föreställer det nya överkastet och den fjärde är en närbild på Tusse.